

How to Save Seeds from Your Garden for Next Year: A Comprehensive Guide
Imagine the satisfaction of nurturing a plant from a tiny seed, watching it grow, and then saving its seeds to repeat the cycle next year. This isn’t just a frugal way to garden; it’s a deeper connection to nature and a way to ensure you have the exact varieties you love each season. Saving seeds, also known as seed saving, is an age-old practice that’s been around since the dawn of agriculture, and it’s not nearly as complicated as some may think. Whether you’re a seasoned gardener or just starting out, this guide will break down everything you need to know to confidently save seeds from your garden and keep your favorites thriving year after year.
| Seed Saving Factor | Description | Importance |
|---|---|---|
| Plant Type | Knowing if a plant is open-pollinated or a hybrid | Ensures you’ll get true-to-type seeds |
| Maturity | Understanding when a plant is at its peak for seed saving | Increases seed viability and germination rate |
| Selection | Choosing the healthiest and most productive plants | Ensures strong, healthy plants for future generations |
| Harvesting | Knowing the proper techniques for collecting seeds | Prevents loss and damage to precious seeds |
| Drying | Properly drying seeds to prevent mold and rot | Crucial for long-term seed storage |
| Storage | Storing seeds in a cool, dark, and dry environment | Maintains seed viability for several seasons |
| Labeling | Correctly labeling saved seeds with details | Avoids confusion and ensures proper usage |
Understanding the Basics: Open-Pollinated vs. Hybrid Seeds
Before you begin saving seeds, it’s crucial to understand the difference between open-pollinated and hybrid plants. This knowledge will significantly impact the success of your seed-saving efforts.
Open-Pollinated Seeds: True-to-Type
Open-pollinated plants are those that naturally pollinate through wind, insects, or other natural means. This means that the seeds they produce will grow into plants that are very similar, if not identical, to the parent plant. These seeds are “true-to-type,” making them ideal for seed saving. If you save seeds from an open-pollinated tomato, for example, you’ll get the same type of tomatoes next year (with very minor variations). Many heirloom varieties are open-pollinated, adding to their charm and making them excellent candidates for seed saving.
Hybrid Seeds: Not for Seed Saving
Hybrid plants, on the other hand, are created by cross-pollinating two different parent plants. This is often done to combine the best traits of each parent, such as disease resistance, size, or yield. The seeds produced by a hybrid plant, however, will not grow into plants that are the same as the parent plant. In many cases, they may be infertile, or they may revert to a parent type. While they might occasionally grow, they will be very different and unpredictable from what you originally planted. Therefore, it’s generally not recommended to save seeds from hybrid plants. This is also one of the reasons you see so many seed companies out there. They must keep breeding and creating new hybrid seeds for people to purchase and plant each year.
Choosing the Right Plants for Seed Saving
Not all of your garden plants will make ideal candidates for seed saving. Here’s how to select the best ones:
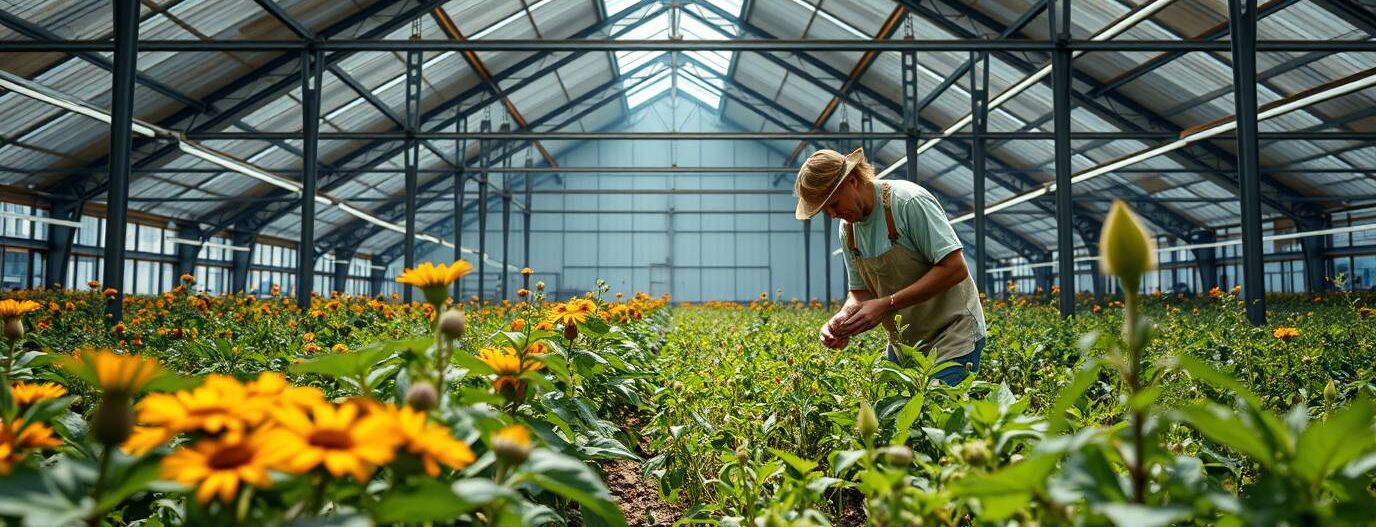
Select the Healthiest Plants
Start by choosing the plants that are the healthiest and most vigorous in your garden. These are the plants that have shown resistance to pests and diseases, and are producing the best fruit or flowers. Saving seeds from strong plants will increase the chance of getting strong plants in the next generation. Avoid any plants that show signs of disease or weakness, as this may pass onto the future seeds. We are choosing the plant “line” for future years of the plant’s life.
Focus on the Best Produce
When it comes to vegetables or fruits, select the plants that are producing the most and the highest quality. For example, if you are saving tomato seeds, choose the plants that produce the largest and most flavorful fruits. This ensures that you’re preserving the best characteristics in your future plants. For flowers, select those with the most vibrant colors or the most profuse blooms.
Allow for Full Maturity
It’s vital to let the produce fully mature before harvesting seeds. This is often longer than you would when harvesting to eat. For example, a squash may need to remain on the vine well past the point when it is typically eaten. This ensures that the seeds are fully developed and viable. Harvesting too soon can result in weak or non-germinating seeds.
Seed Harvesting Methods: Step-by-Step
The method for harvesting seeds depends on the type of plant you are working with. Here’s a breakdown of common methods:
Dry Seed Harvesting
This method is used for plants that naturally dry their seeds within a pod or husk. Think of plants like peas, beans, lettuce, or poppies. Here’s the process:
- Allow to Dry: Let the seed pods or heads dry completely on the plant. They should be brown and brittle.
- Harvest the Seed Heads: Carefully cut off the dry seed heads or pods, placing them in a paper bag or container.
- Extract the Seeds: If needed, gently crush the pods or heads to release the seeds. This can often be done by hand or through a strainer.
- Separate the Seeds: Separate the seeds from the chaff (any bits of dried plant matter) through sieving or winnowing (using wind or a gentle breeze).
Wet Seed Harvesting
This method is used for plants with fleshy fruits, like tomatoes, cucumbers, melons, and peppers. Here’s how it’s done:
- Harvest Ripe Fruits: Pick the fruits when they are fully ripe. Ideally, they should be a bit overripe when you would normally pick them to eat.
- Extract the Seeds: Cut open the fruit and scoop out the seeds with a spoon into a container. For some like peppers, you can simply remove the seeds.
- Ferment (Optional but Recommended): For tomatoes and some other wet seeds, fermentation is important to remove a gel-like substance surrounding the seeds and prevent seed-borne diseases. Place the seeds with pulp and juice into a jar with a bit of water. Stir it daily and let it sit for 2-3 days. Mold will form on the surface. Pour everything through a strainer and rinse thoroughly with water. Only good seeds should remain.
- Rinse: Rinse the seeds thoroughly under running water to remove any remaining pulp or flesh.
Drying Your Harvested Seeds
Once you’ve harvested your seeds, it’s essential to dry them properly. Moisture can lead to mold and premature germination, which can ruin your entire crop.
Air Drying
Air drying is a simple, effective method for most types of seeds. Here’s how to do it:
- Lay Out the Seeds: Spread the seeds out in a single layer on a paper towel, a paper plate, or a screen. Make sure they are not piled on top of each other.
- Find a Dry Location: Place the seeds in a cool, dry, and well-ventilated area, away from direct sunlight.
- Dry Completely: Allow the seeds to dry for several days or even weeks until they are completely dry and brittle. They should snap instead of bend.
Silica Gel Drying
For particularly sensitive seeds or for areas with high humidity, silica gel packets can be helpful. Here’s how to use them:
- Layer the Seeds: Place a layer of silica gel packets in an airtight container. Place a piece of paper or screen over the silica. Then put your seeds on top.
- Dry with Silica Gel: Seal the container and allow the silica gel to absorb the moisture from the seeds for 1-2 weeks.
- Check for Dryness: Remove and check that the seeds are dry before storing.
Storing Your Seeds for Long-Term Viability
Once your seeds are completely dry, they must be stored properly to maintain their viability until the next planting season. Follow these guidelines for successful seed storage:
The Cool, Dark, and Dry Rule
The most important factors for seed storage are temperature, light, and moisture: seeds must be stored in a cool, dark, and dry environment. A dark, dry spot in the basement is generally good, but a pantry can work as well, as long as there aren’t drastic shifts in temperature. High temperatures and moisture are a seed’s worst enemies. A stable environment will keep your seeds viable the longest.
Airtight Containers
Use airtight containers to protect your seeds from moisture, insects, and other pests. Glass jars or small sealed plastic bags work well. Make sure the containers are clean and completely dry before placing your seeds inside.
Seed Storage Envelopes
Paper envelopes are also great for seed storage and especially useful for large amounts of seeds that you plan to plant next year. You should always double bag any seeds stored this way to prevent moisture. You can buy seed storage envelopes or simply make your own using small folded pieces of paper.
Adding Desiccants
For added protection against moisture, include a desiccant (like a silica gel packet) in your seed storage containers, especially if you live in a humid area. This helps absorb any remaining moisture and ensures the longevity of your seeds. Rice can also be used as a great desiccant.
Long-Term Cold Storage
For long-term storage (several years or longer), consider using a refrigerator or freezer. Place the seeds in sealed containers inside a freezer bag. Be sure to let the container warm up completely to room temperature before opening to prevent condensation. Do not ever refrigerate wet seeds.
Labeling Your Saved Seeds
Proper labeling is just as crucial as proper storage. Without clear and detailed labels, you might end up planting the wrong seeds or losing track of essential information.
Information to Include
Always label your seed packets or containers with the following information:
- Plant Name and Variety.
- Date of Harvest
- Specific Notes: Note anything unique about the specific plant you saved seeds from.
Use Permanent Labels
Use permanent markers or labels that won’t fade or smudge over time. This ensures that your labels remain readable and accurate. A waterproof pen is especially useful in case of any moisture.
Tips for Success in Saving Seeds
Here are some additional tips to ensure your seed-saving endeavors are successful:
Start Small
If you’re new to seed saving, begin with a few easy-to-save plants, such as peas, beans, or lettuce. This will allow you to learn the process without feeling overwhelmed.
Research Specific Plants
Different plants have different seed-saving requirements. Research the specific needs of the plants you are growing to ensure the best results. This will help you understand the nuances of seed saving for that particular variety.
Join a Seed Saving Community
Consider joining a local seed-saving club or online community. This will allow you to share your experience and learn from the community of other seed savers. You can also share or trade seeds.
Keep Records
Keep a garden journal to track your seed-saving efforts and identify what works best for you and your garden. Write down the success rates of different varieties and any problems you encounter. This will help you refine your techniques over time.
Plan for the Future
Think ahead about how much seed you will need in future years. You might want to save excess seeds to trade or gift, as the abundance of seeds in one year can differ in the next year.
Saving seeds from your garden is a rewarding practice that not only saves you money but also strengthens your connection to the natural world. With the right knowledge and a little practice, you can become a confident seed saver and enjoy the fruits of your labor year after year. Happy gardening!